Breakfast casseroles are a classic for a reason—they’re comforting, hearty, and perfect for feeding a crowd. But my Cheesy Bacon & Hashbrown Casserole takes it up a notch: it’s high in protein, packed with hidden veggies, and still totally family-friendly.
With a combination of egg whites, hashbrowns, bacon, and cauliflower rice, this casserole is filling, flavorful, and sneaky nutritious. The best part? Each bite is cheesy, savory, and satisfying, making it the ultimate grab-and-go breakfast or brunch dish.
Why You’ll Love This Recipe
- High Protein: Each serving delivers 29g protein, making it perfect for fueling your morning or refueling after a workout.
- Hidden Veggies: Cauliflower rice blends seamlessly with the hashbrowns, adding fiber and nutrients without altering the taste.
- Family-Friendly: The classic bacon, cheese, and hashbrown combo is a hit with kids and adults alike.
- Make-Ahead Friendly: Assemble the casserole ahead of time and bake fresh in the morning, or freeze for later.
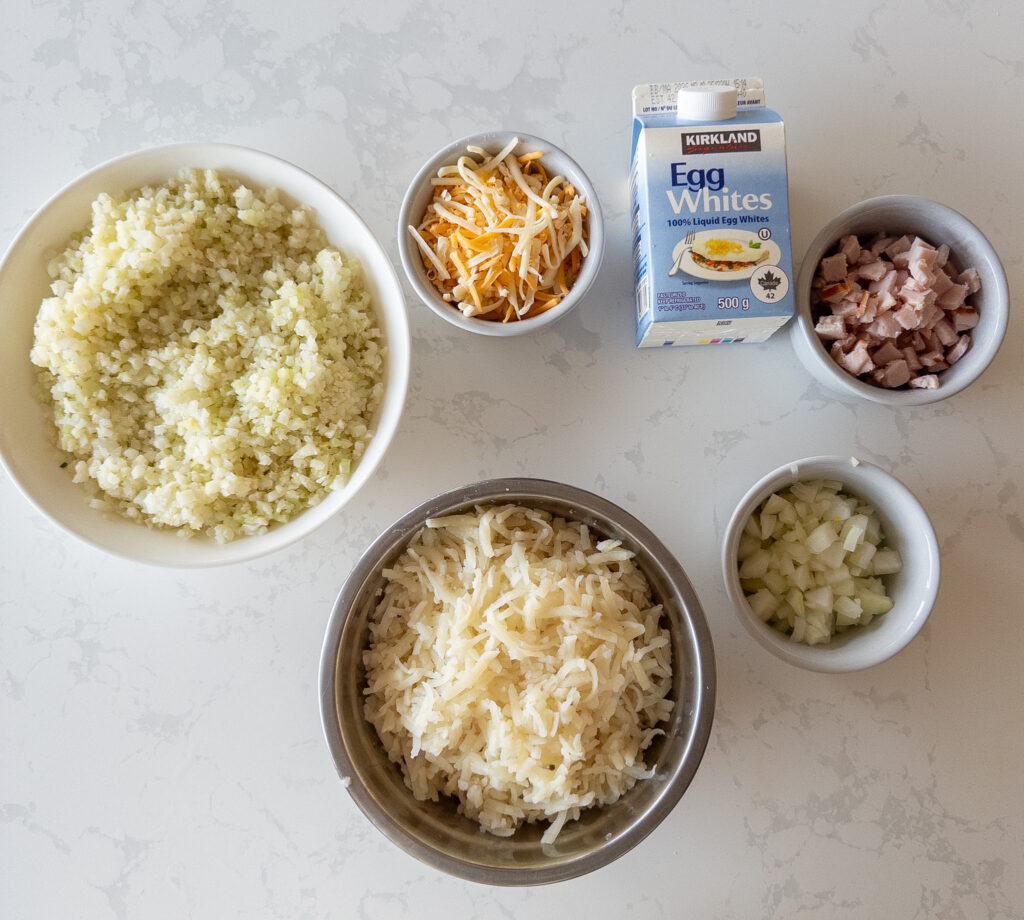
Here are the Main Ingredients you will Need:
Step-by-Step Instructions:
Preheat the oven to 390°F
Steam frozen cauliflower rice for 5 minutes while you chop back bacon and onion.
In a large mixing bowl, combine egg whites, hashbrowns, back bacon, steamed cauliflower rice, almond milk, onion, and seasonings.
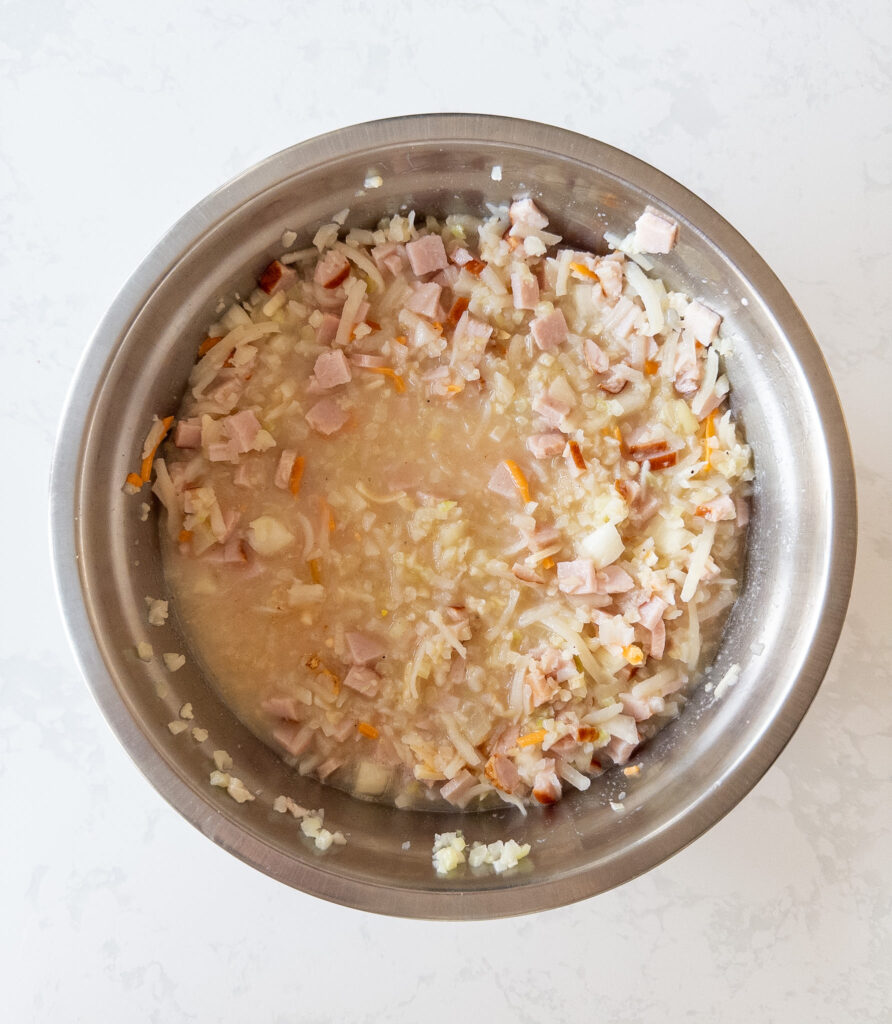
Stir in 45 g (about ¼ of the total) shredded cheese. Reserve the remaining cheese for topping.
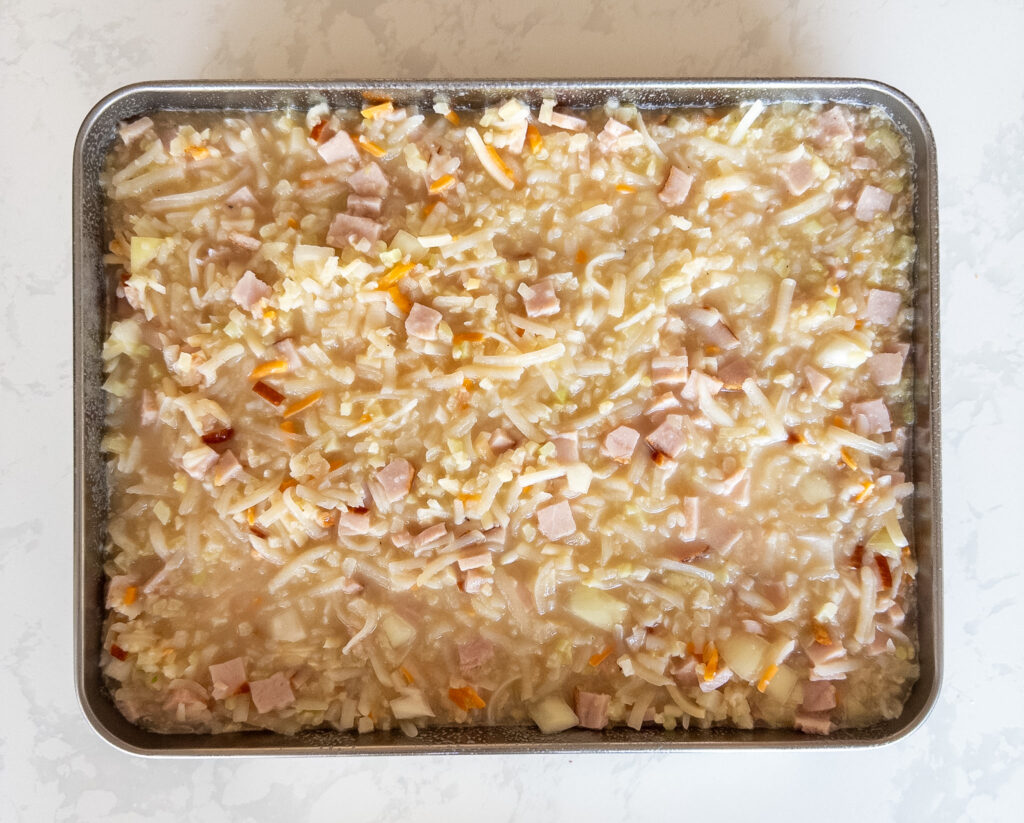
Lightly coat a 9×13-inch baking dish with cooking spray. Transfer the mixture evenly into the dish.
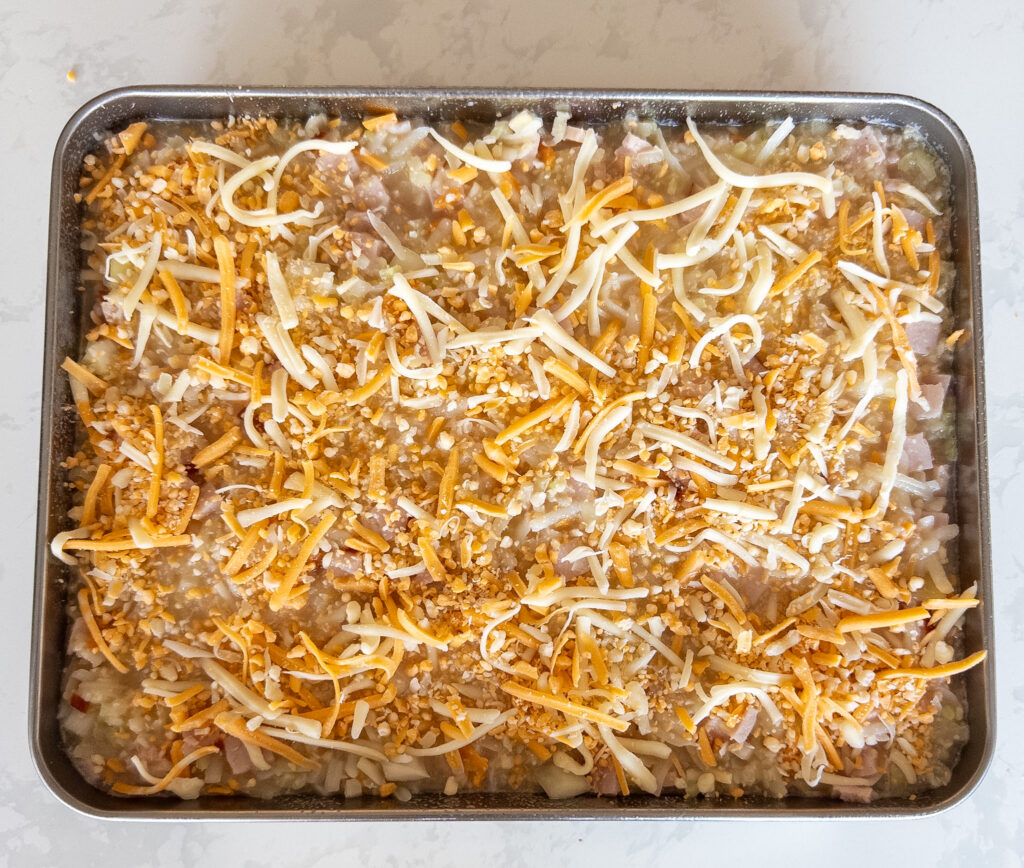
Sprinkle the remaining cheese over the top.
Cover with foil and bake for 65-75 minutes, or until the casserole is starting to set, then remove foil and bake for an additional 10-15 minutes until it is set in the center.
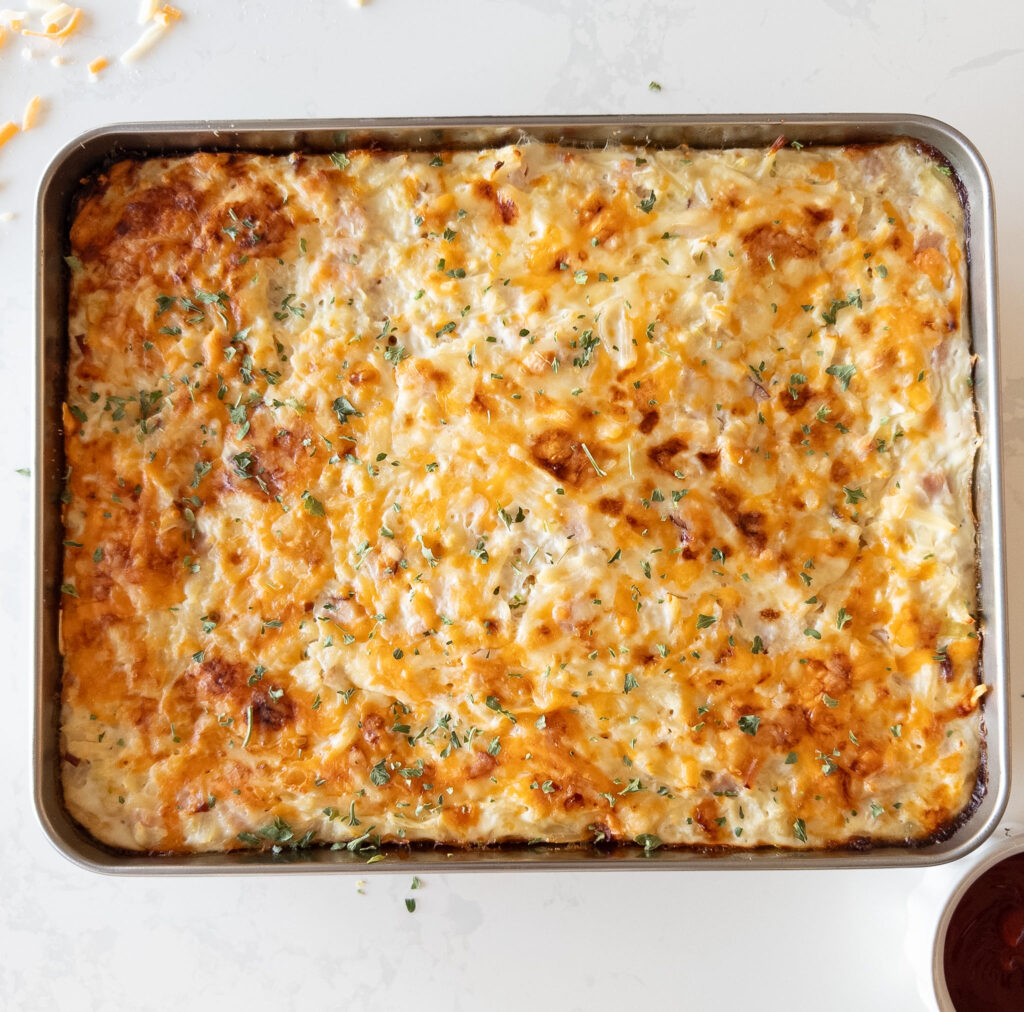
Optional: broil for a few minutes at the end for a golden, crispy cheese topping.
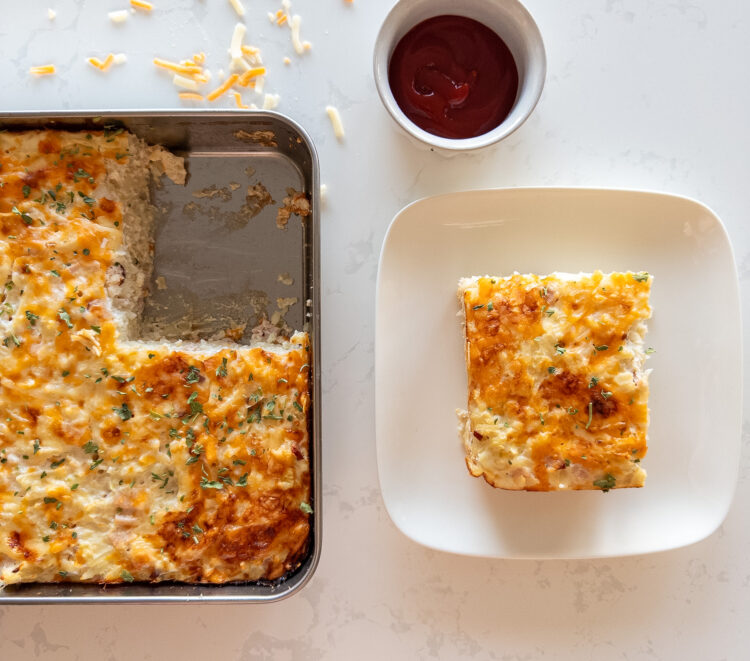
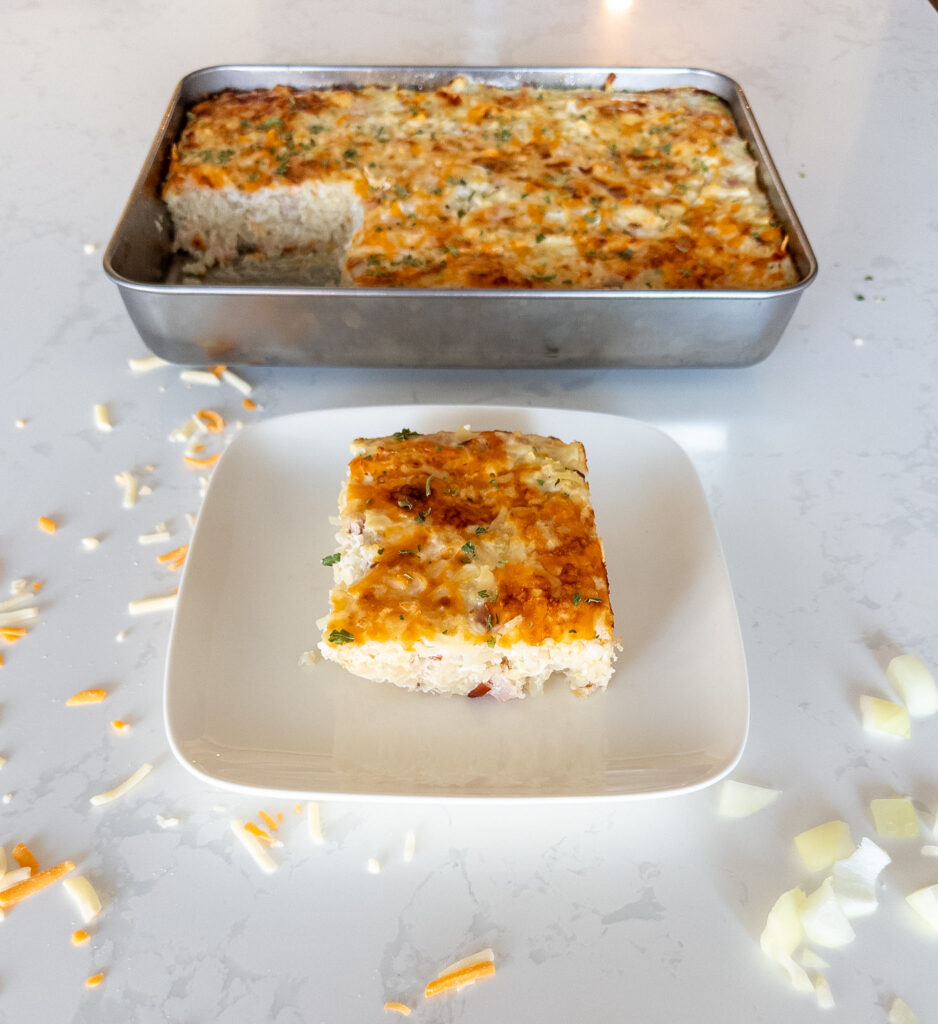
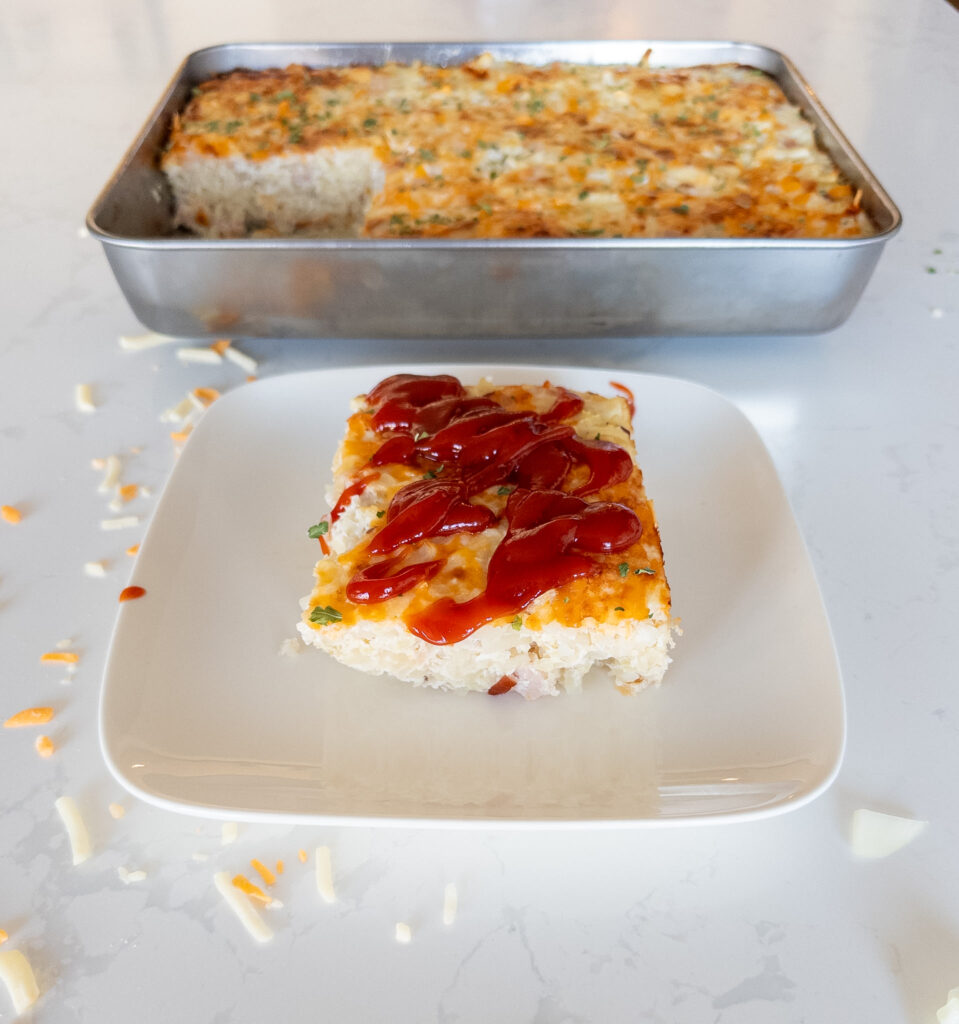
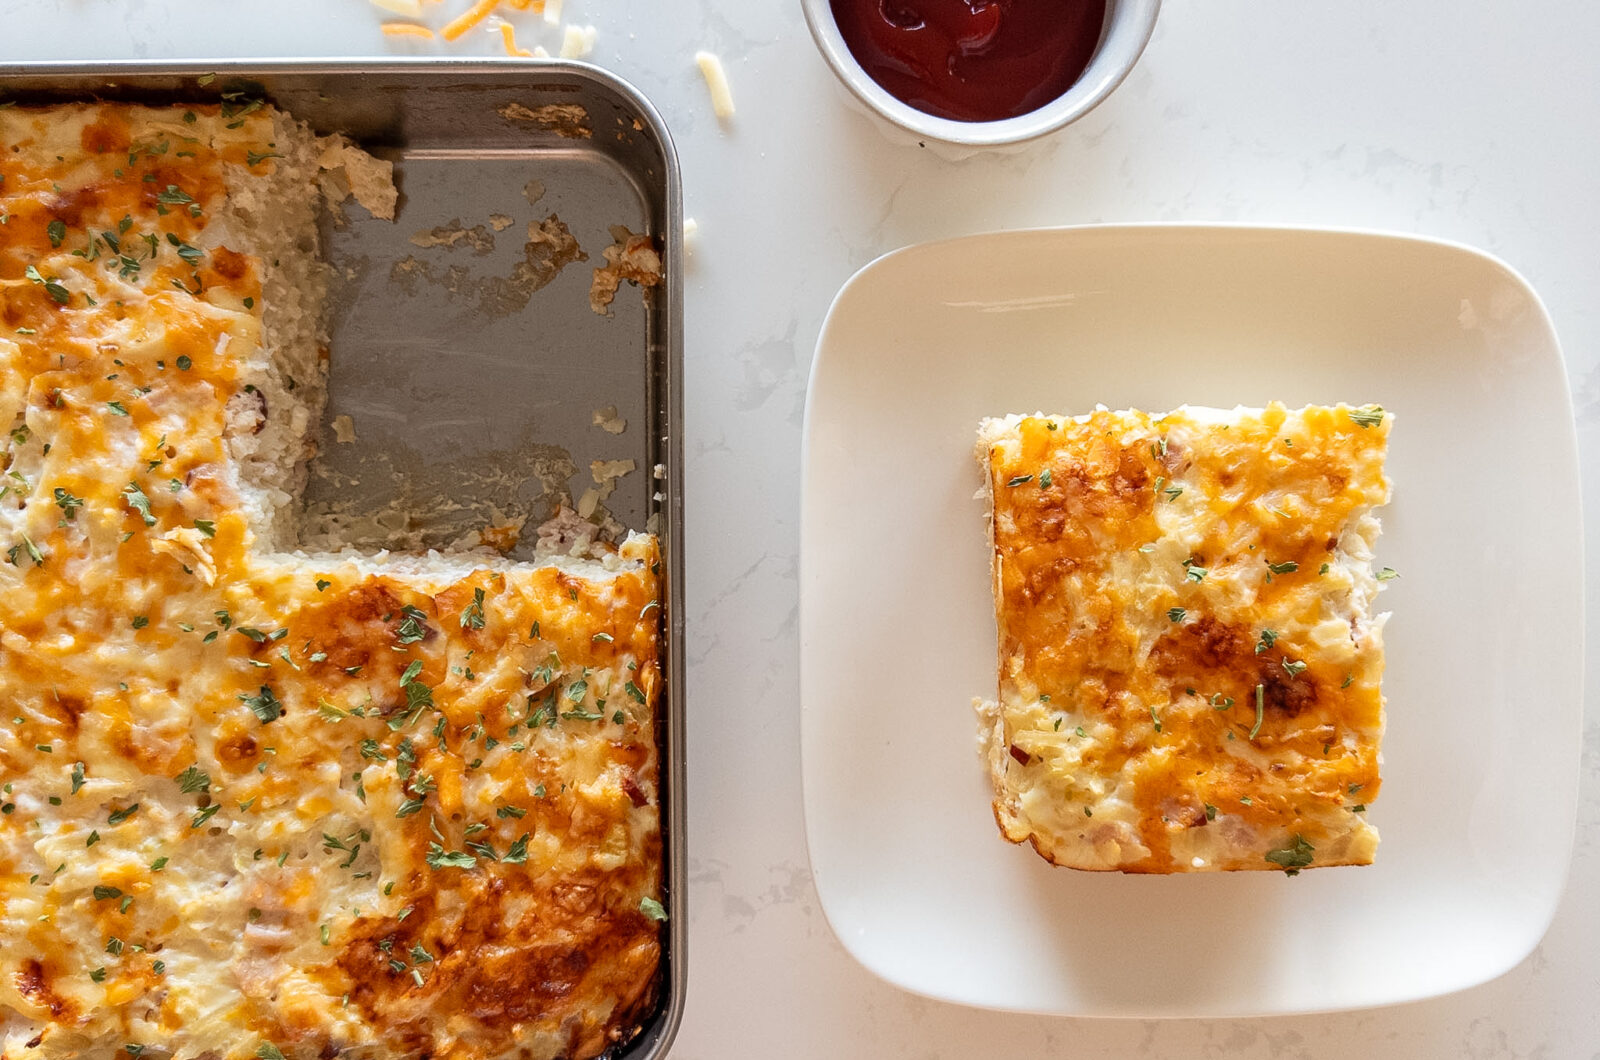
Let rest for several minutes before slicing and serving. I like having it with ketchup or hot sauce!
Recipe Notes and Modifications:
- The back bacon used for this recipe for macros is the “Freybe” brand from Costco
- I like using the shredded dehydrated Golden Grill Potatoes from Costco for this recipe- 650g = about 1 and 1/2 packs prepared!
- Make ahead:
Assemble the casserole the night before, cover, and refrigerate. Bake fresh in the morning (may need to add 5–10 extra minutes). - Serving ideas:
Great with ketchup, hot sauce, or even wrapped in a tortilla for a high-protein breakfast burrito. - Keeps well in the fridge for up to 4 days. Can be frozen in individual slices.
Other Recipes you May Enjoy:
Eggs Benedict Breakfast Casserole
Cheesy Chicken Tater Tot Casserole
Everything Bagel Breakfast Bake
This Cheesy Bacon & Hashbrown Casserole is creamy, cheesy, and savory, with just the right amount of back bacon. It’s high in protein, has hidden veggies, and is family-friendly—everything you want in a breakfast or brunch recipe.
It’s perfect for meal prep, feeding a crowd, or lazy weekend mornings, and versatile enough to customize for your family’s tastes.
If you give this recipe a try, or any others I share, I’d love to hear from you! Rate the recipe, leave a comment, or tag me on Instagram @thebalancedbitefoodie so I can see your delicious creations and thank you for trying them!
Cheesy Bacon and Hashbrown Casserole
6
Servings15
minutes1
hour15
minutes306
kcal390 grams
1
hour30
minutesTo track this recipe on My Fitness Pal, search TBB Cheesy Bacon and Hashbrown Casserole
Please note, if you modify serving size using the blog program, only the first measurement serving size will change, not the second measurement in brackets (typically cups/tbsp).
Keep the screen of your device on
Ingredients
600 g liquid egg whites (2 ½ cups)
650 g shredded hashbrowns, cooked – see note
300 g diced back bacon- see note
500 g frozen cauliflower rice
145 g light shredded cheese, divided
125 ml almond milk (½ cup)
80 g white onion, finely diced (1/2 medium)
2 tsp Salt
½ tsp black pepper
1 tsp Garlic Powder
1 tsp Onion Powder
½ tsp paprika
Directions
- Preheat the oven to 390°F
- Steam frozen cauliflower rice for 5 minutes while you chop back bacon and onion.
- In a large mixing bowl, combine egg whites, hashbrowns, back bacon, steamed cauliflower rice, almond milk, onion, and seasonings.
- Stir in 45 g (about ¼ of the total) shredded cheese. Reserve the remaining cheese for topping.
- Lightly coat a 9×13-inch baking dish with cooking spray. Transfer the mixture evenly into the dish.
- Sprinkle the remaining cheese over the top.
- Cover with foil and bake for 65-75 minutes, or until the casserole is starting to set, then remove foil and bake for an additional 10-15 minutes until it is set in the center.
- Optional: broil for a few minutes at the end for a golden, crispy cheese topping.
- Let rest for several minutes before slicing and serving. I like having it with ketchup or hot sauce!
Recipe Notes & Modifications
- The back bacon used for this recipe for macros is the “Freybe” brand from Costco
- I like using the shredded dehydrated Golden Grill Potatoes from Costco for this recipe- 650g = about 1 and 1/2 packs prepared!
- Make ahead:
Assemble the casserole the night before, cover, and refrigerate. Bake fresh in the morning (may need to add 5–10 extra minutes). - Serving ideas:
Great with ketchup, hot sauce, or even wrapped in a tortilla for a high-protein breakfast burrito. - Keeps well in the fridge for up to 4 days. Can be frozen in individual slices.
Nutrition Facts
- Serving Size: 390
- Total number of serves: 6
- Calories: 309kcal
- Fat: 5.8g
- Carbohydrates: 32.5g
- Fiber: 3.8g
- Protein: 29.3g
Did you try this Recipe?!
I would love to see your creation and thank you for trying this! Please tag me on instagram @thebalancedbitefoodie
Like this recipe?
Follow me on Pinterest @thebalancedbite
Follow my Facebook page!
Follow The Balanced Bite on Facebook